|
|
|
|
| Forward/Reverse ESC for DC Carbon Brushes Motor | |||||
| Mini Shuttle | Shuttle | Shuttle-E | Shuttle-P | ||
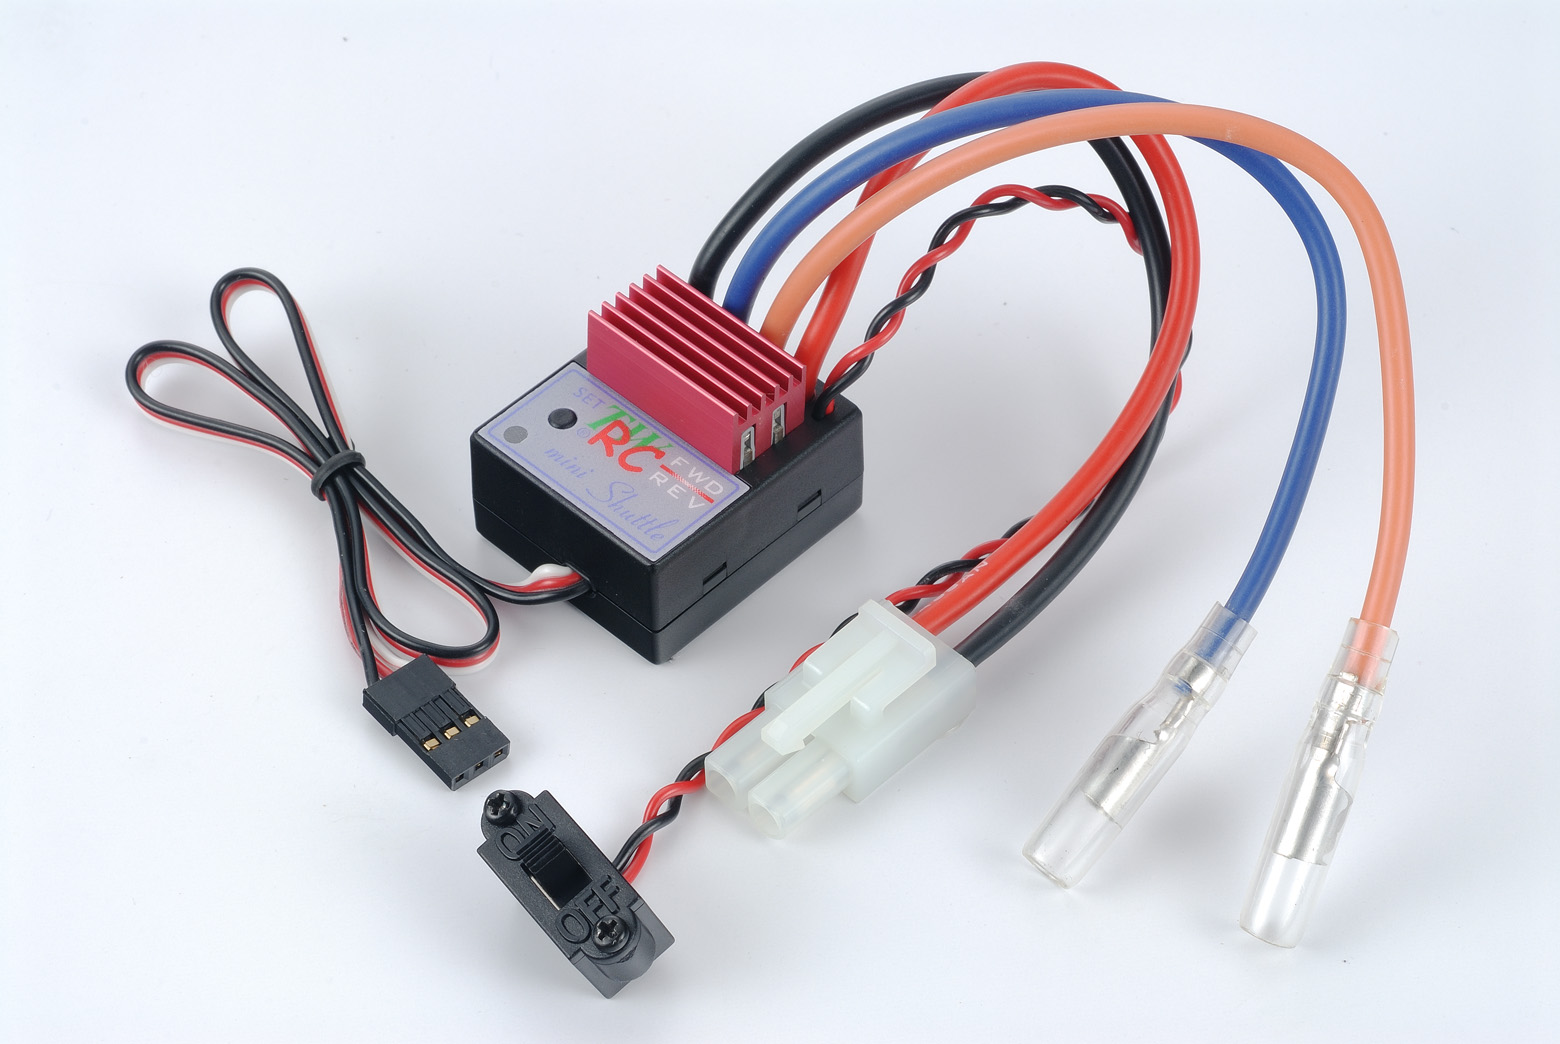
Feature:Mini
Shuttle is suitable for R/C modeling cars and/or boats and features a
light loading DC carbon brushes motor with over-heat output power regular,
reverse
function
and no signal motor locked
function. Single push button to setup, easy to operate (see Setup). 3.4kHz PWM for smooth
speed control.
Operation Mode LED function:
※LED OFF:Without
signal, ESC is powered and Transmitter power is OFF, it is possible that
LED flashes because of noise.
Installation:To
reduce noise, solder the capacitors to motor polarities and shell (one
pin to polarity and the other pin to shell). Connect Mini Shuttle ESC
between Receiver throttle and motor, and fix with double side foam tape.
Never remove heat sink of ESC. Disconnect motor before Setup.
Setup:
2.Put throttle stick to neutral and turn Transmitter to ON.
5.Put stick at neutral, LED will flash faster after about 3 seconds,
and then LED will turn to flash slowly(one flash per second)after about
4.5 seconds, that means ESC completed SETUP and saved in memory.
6.Preventing gears breakdown, when turn reverse after high forward
speed, ESC will brake about 0.6 seconds first. If uses want to remove
this function, push setup button again in Step5
when LED is flashing faster(After pushing, LED will turn always ON).
1.Turn Transmitter ON, connect ESC to motor and battery. Turn ESC ON, push control stick forward and check if motor runs(ensure motor wires are not shorting and motor is not locked before test). 2.If motor runs, push stick to full speed and check if LED turns ON. 3.Pull stick to reverse full speed and check if motor slows down immediately and then turn to reverse, and the LED turns to flash 0.2s ON/OFF. 4.If LED is ON when reverse and flashes 0.2s ON/OFF when forward, modify Transmitter throttle control switch and setup again. If everything is correct, enjoy the fun.
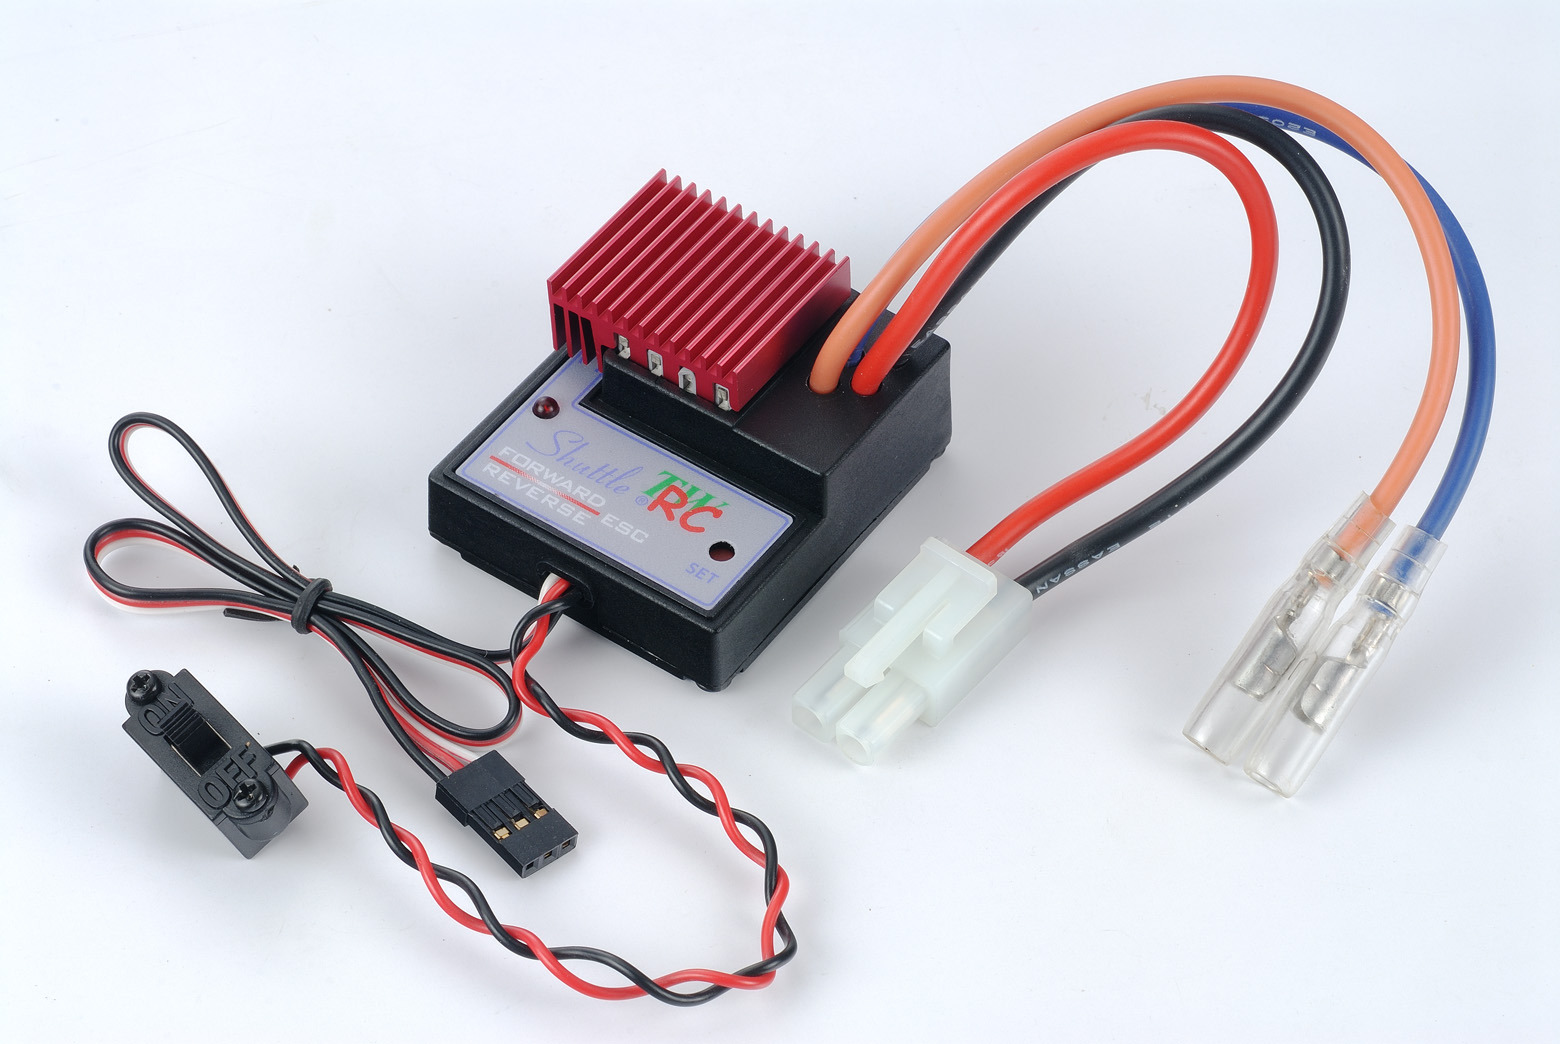
◎Shuttle: Feature:Shuttle
is suitable for R/C modeling cars and/or boats and features a middle
loading DC carbon brushes motor
with over-heat output power regular,
reverse
function
and no signal motor locked function. Single push
button to setup, easy to operate (see
Setup). 3.4kHz PWM for smooth speed control.
Operation Voltage:DC 5V~12V (NiCd、NiMH battery
pack 5~8 cells). ※LED flashes quickly (ON/OFF 0.2S/0.2S):Control stick is in neutral. ※LED always ON:Control stick is set to forward or reverse, not in neutral.
Operation Mode LED function:
※LED OFF:Without signal, ESC is powered and Transmitter power is OFF, it
is possible that LED flashes because of noise. Installation:To reduce noise, solder the capacitors to motor polarities and shell (one pin to polarity and the other pin to shell). Connect Shuttle ESC between Receiver throttle and motor, and fix with double side foam tape. Never remove heat sink of ESC. Disconnect motor before Setup.
Setup:
2.Put throttle stick to neutral and turn Transmitter to ON. 5.Put stick at neutral, LED will flash faster after about 3 seconds, and then LED will turn to flash slowly(one flash per second)after about 4.5 seconds, that means ESC completed SETUP and saved in memory.
6.Preventing gears breakdown, when turn reverse after high forward
speed, ESC will brake about 0.6 seconds first. If uses want to remove
this function, push setup button again in
Step5 when LED is flashing faster(After pushing,
LED will turn always ON). Test and
Operate:
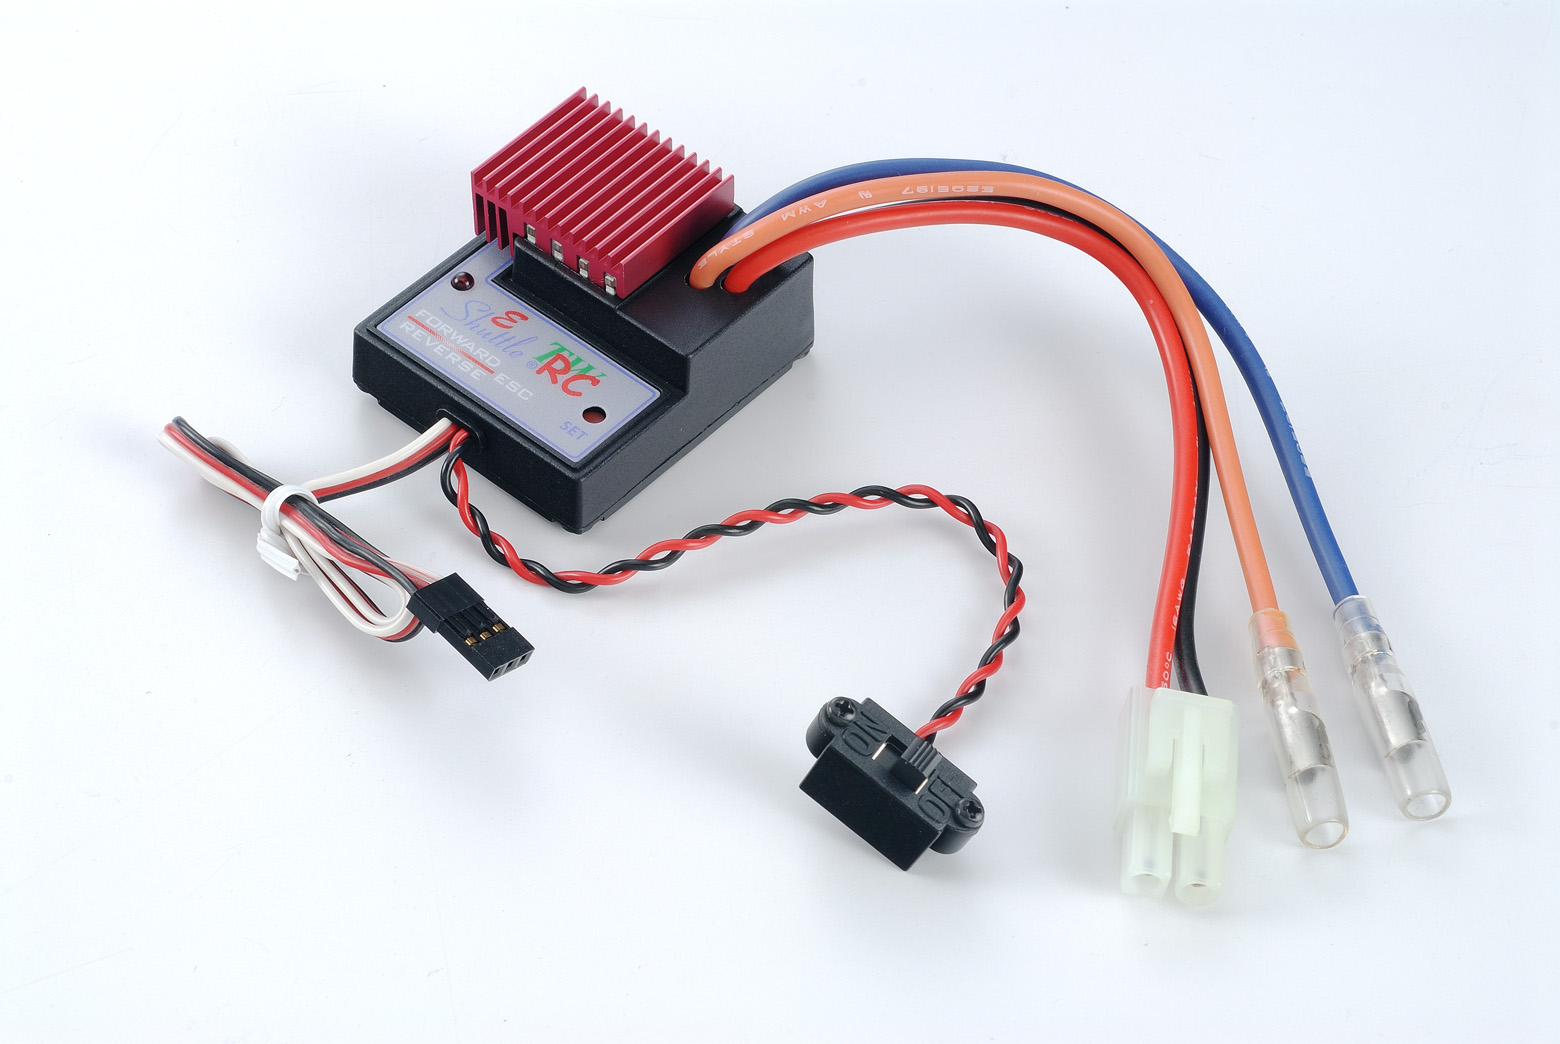
Feature:Shuttle-E is suitable for R/C modeling
cars and/or boats and features a middle-high loading DC carbon brushes
motor with over-heat output power
regular,
reverse
function
and no signal motor locked function. Single push
button to setup, easy to operate (see
Setup). 3.4kHz PWM for smooth speed control.
Operation Voltage:DC 5V~12V (NiCd、NiMH battery
pack 5~8 cells).
Operation Mode LED function:
※LED OFF:Without signal, ESC is powered and Transmitter power is OFF, it
is possible that LED flashes because of noise. Installation:To reduce noise, solder the capacitors to motor polarities and shell (one pin to polarity and the other pin to shell). Connect Shuttle-E ESC between Receiver throttle and motor, and fix with double side foam tape. Never remove heat sink of ESC. Disconnect motor before Setup.
Setup:
2.Put throttle stick to neutral and turn Transmitter to ON. 5.Put stick at neutral, LED will flash faster after about 3 seconds, and then LED will turn to flash slowly(one flash per second)after about 4.5 seconds, that means ESC completed SETUP and saved in memory.
6.Preventing gears breakdown, when turn reverse after high forward
speed, ESC will brake about 0.6 seconds first. If uses want to remove
this function, push setup button again in
Step5 when LED is flashing faster(After pushing,
LED will turn always ON). Test and
Operate:
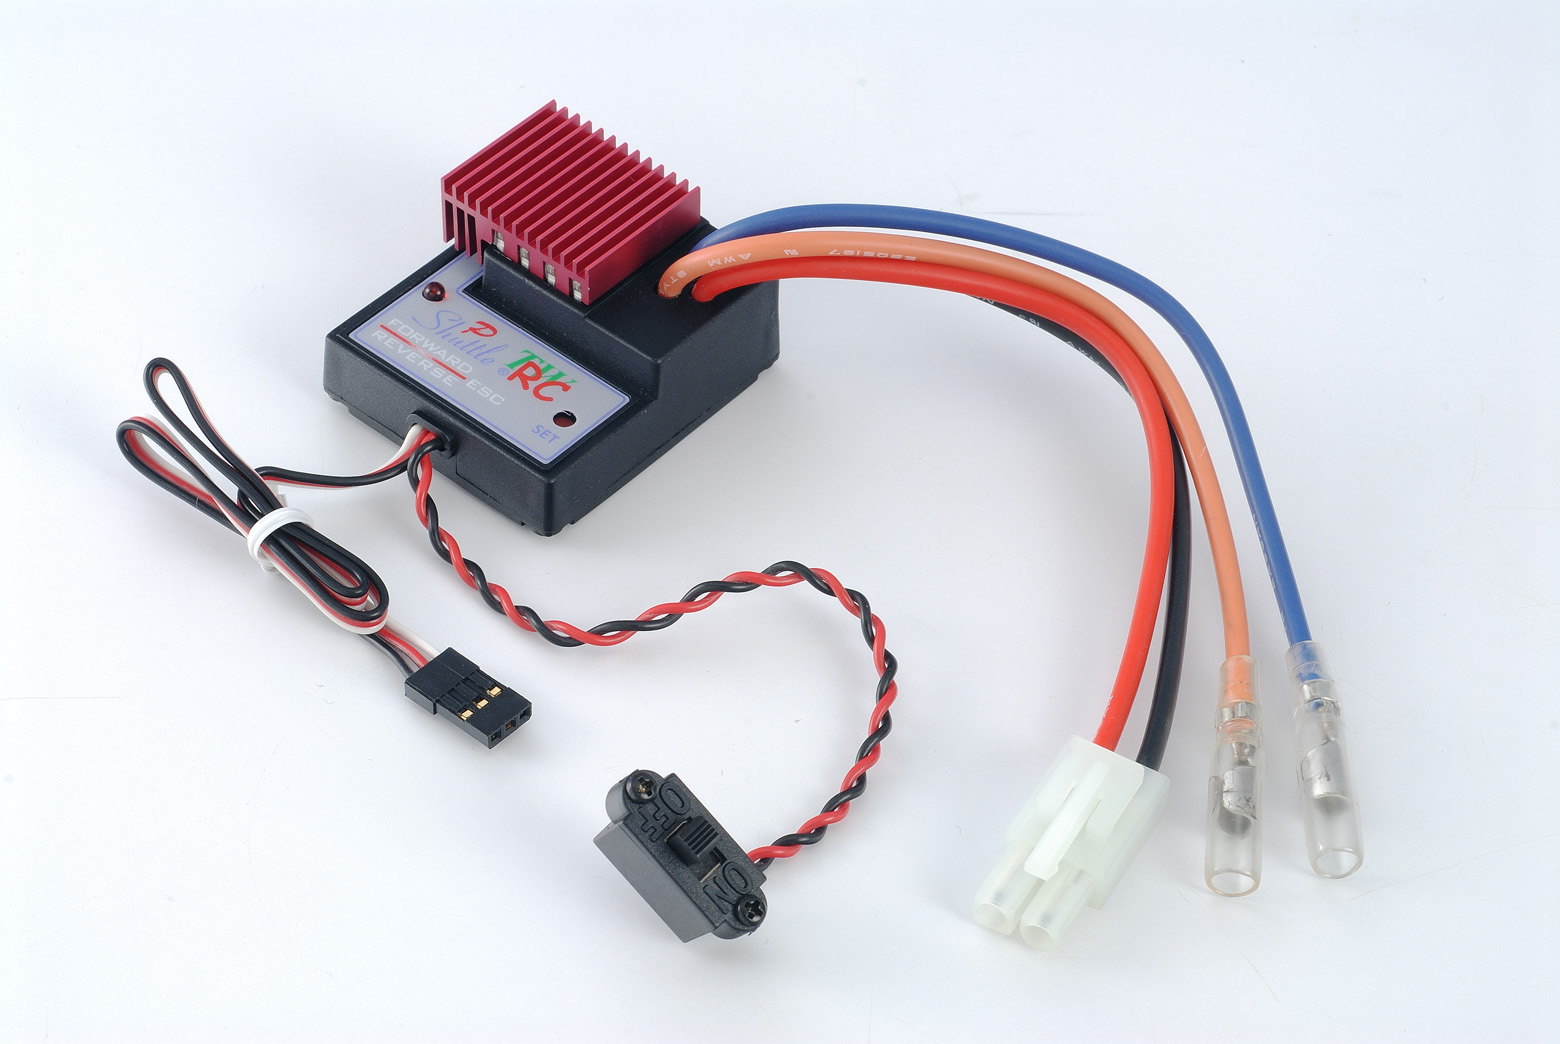
Feature:Shuttle-P
is suitable for R/C modeling cars and/or boats and features a heavy
loading DC carbon brushes motor
with over-heat output power regular,
no signal motor locked,
reverse
and/or
forward only function,
. Single push button to setup, easy to operate
(see Setup).
3.4kHz PWM for smooth speed control.
Operation Voltage:DC 6V~12V (NiCd、NiMH battery
pack 5~8 cells), special version for 4S LiFe (LiFePO4).
Operation Mode LED function:
※LED OFF:Without signal, ESC is powered and Transmitter power is OFF, it
is possible that LED flashes because of noise. Installation:To reduce noise, solder the capacitors to motor polarities and shell (one pin to polarity and the other pin to shell). Connect Shuttle-P ESC between Receiver throttle and motor, and fix with double side foam tape. Never remove heat sink of ESC. Disconnect motor before Setup.
Setup:
2.Put throttle stick to neutral and turn Transmitter to ON. 5.Put stick at neutral, LED will flash faster after about 3 seconds, and then LED will turn to flash slowly(one flash per second)after about 4.5 seconds, that means ESC completed SETUP and saved in memory.
6.Preventing gears breakdown, when turn reverse after high forward
speed, ESC will brake about 0.6 seconds first. If uses want to remove
this function, push setup button again in
Step5 when LED is flashing faster(After pushing,
LED will turn always ON). If uses want ESC without reverse, push setup
button again can set to forward only(After pushing, LED will turn
0.5sON/0.5sOFF). Test and
Operate:
|